NavigationSplitView limitations: Navigation without List views (SwiftUI 4)
Have you noticed that all the examples on Apple's website, on Medium, and by prominent SwiftUI bloggers only use List views for the sidebar(s) and don't have a NavigationStack in the final detail view that they push additional content onto? There's a reason for that, and unfortunately it's not a pleasant one.
If you're looking to build a seemingly simple split-view app with a 1-depth sidebar and an n-depth detail view, using List in the sidebar view is a fine choice. But if you do not want the cookie-cutter look and feel List is not your friend. Unfortunately, NavigationSplitView really, really wants you to use List and if you don't use one then don't you dare try to programmatically push more content onto the detail view's navigation stack.
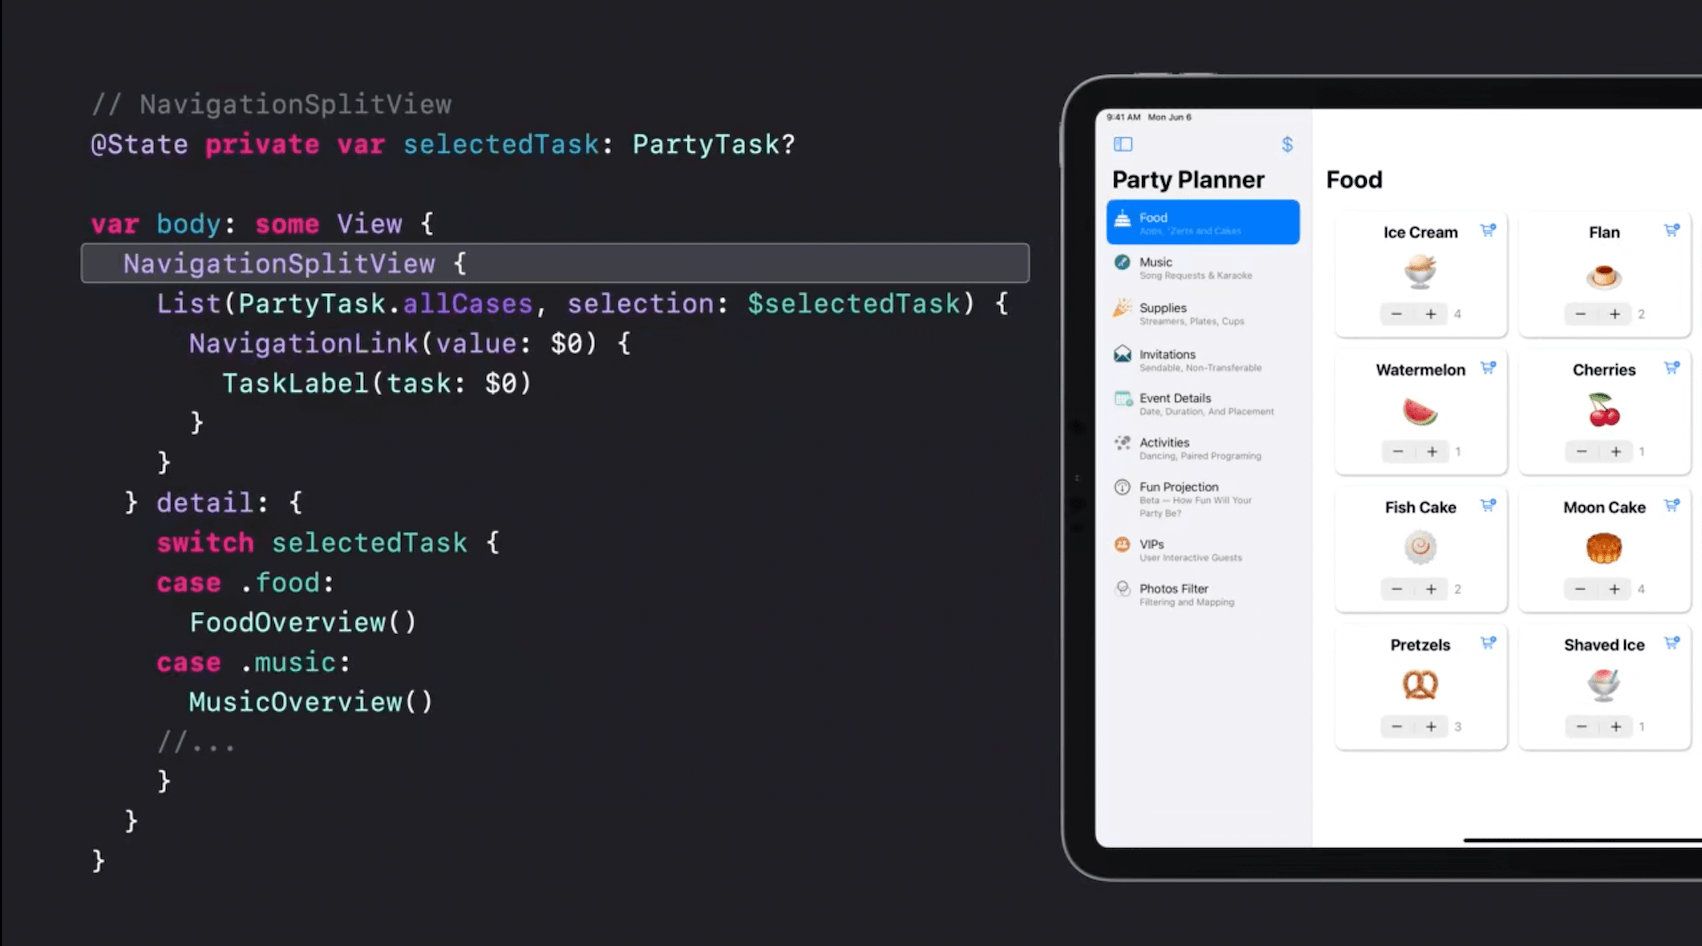
This split view demo from WWDC looks great, but what if your side-bar UI would look better if it were layed out as a grid?
At first glance, dropping the sidebar List view seems to work fine. I will be modifying Majid Jabrayilov's excellent split view code example to demonstrate the limitations (shortcomings? Bugs?) of SwiftUI 4's NavigationSplitView. First let's keep the List-backed sidebar and try to programmatically navigate two levels deep in the detail view:
struct ContentView: View {
    @State private var selectedItem: String?
    @State private var navPath = NavigationPath()

    @State private var folders = [
        "All": [
            "Item1",
            "Item2"
        ],
        "Favorites": [
            "Item2"
        ]
    ]

    var body: some View {
        NavigationSplitView {
            List(selection: $selectedItem) {
                ForEach(folders["All", default: []], id: \.self) { item in
                    NavigationLink(value: item) {
                        Text(verbatim: item)
                    }
                }
            }
            .navigationTitle("All")
        } detail: {
            NavigationStack(path: $navPath) {
                VStack {
                    if let selectedItem {
                        Button("Button \(selectedItem)") {
                            navPath.append(selectedItem)
                        }
                    } else {
                        Text("Choose an item from the content")
                    }
                }
                .navigationDestination(for: String.self) { text in
                    Text(verbatim: text)
                        .navigationTitle(text)
                }
            }
        }
    }
}
This works great, and if you select the “Button ItemN” button, you will see it programmatically pushes a view onto the detail view's stack.
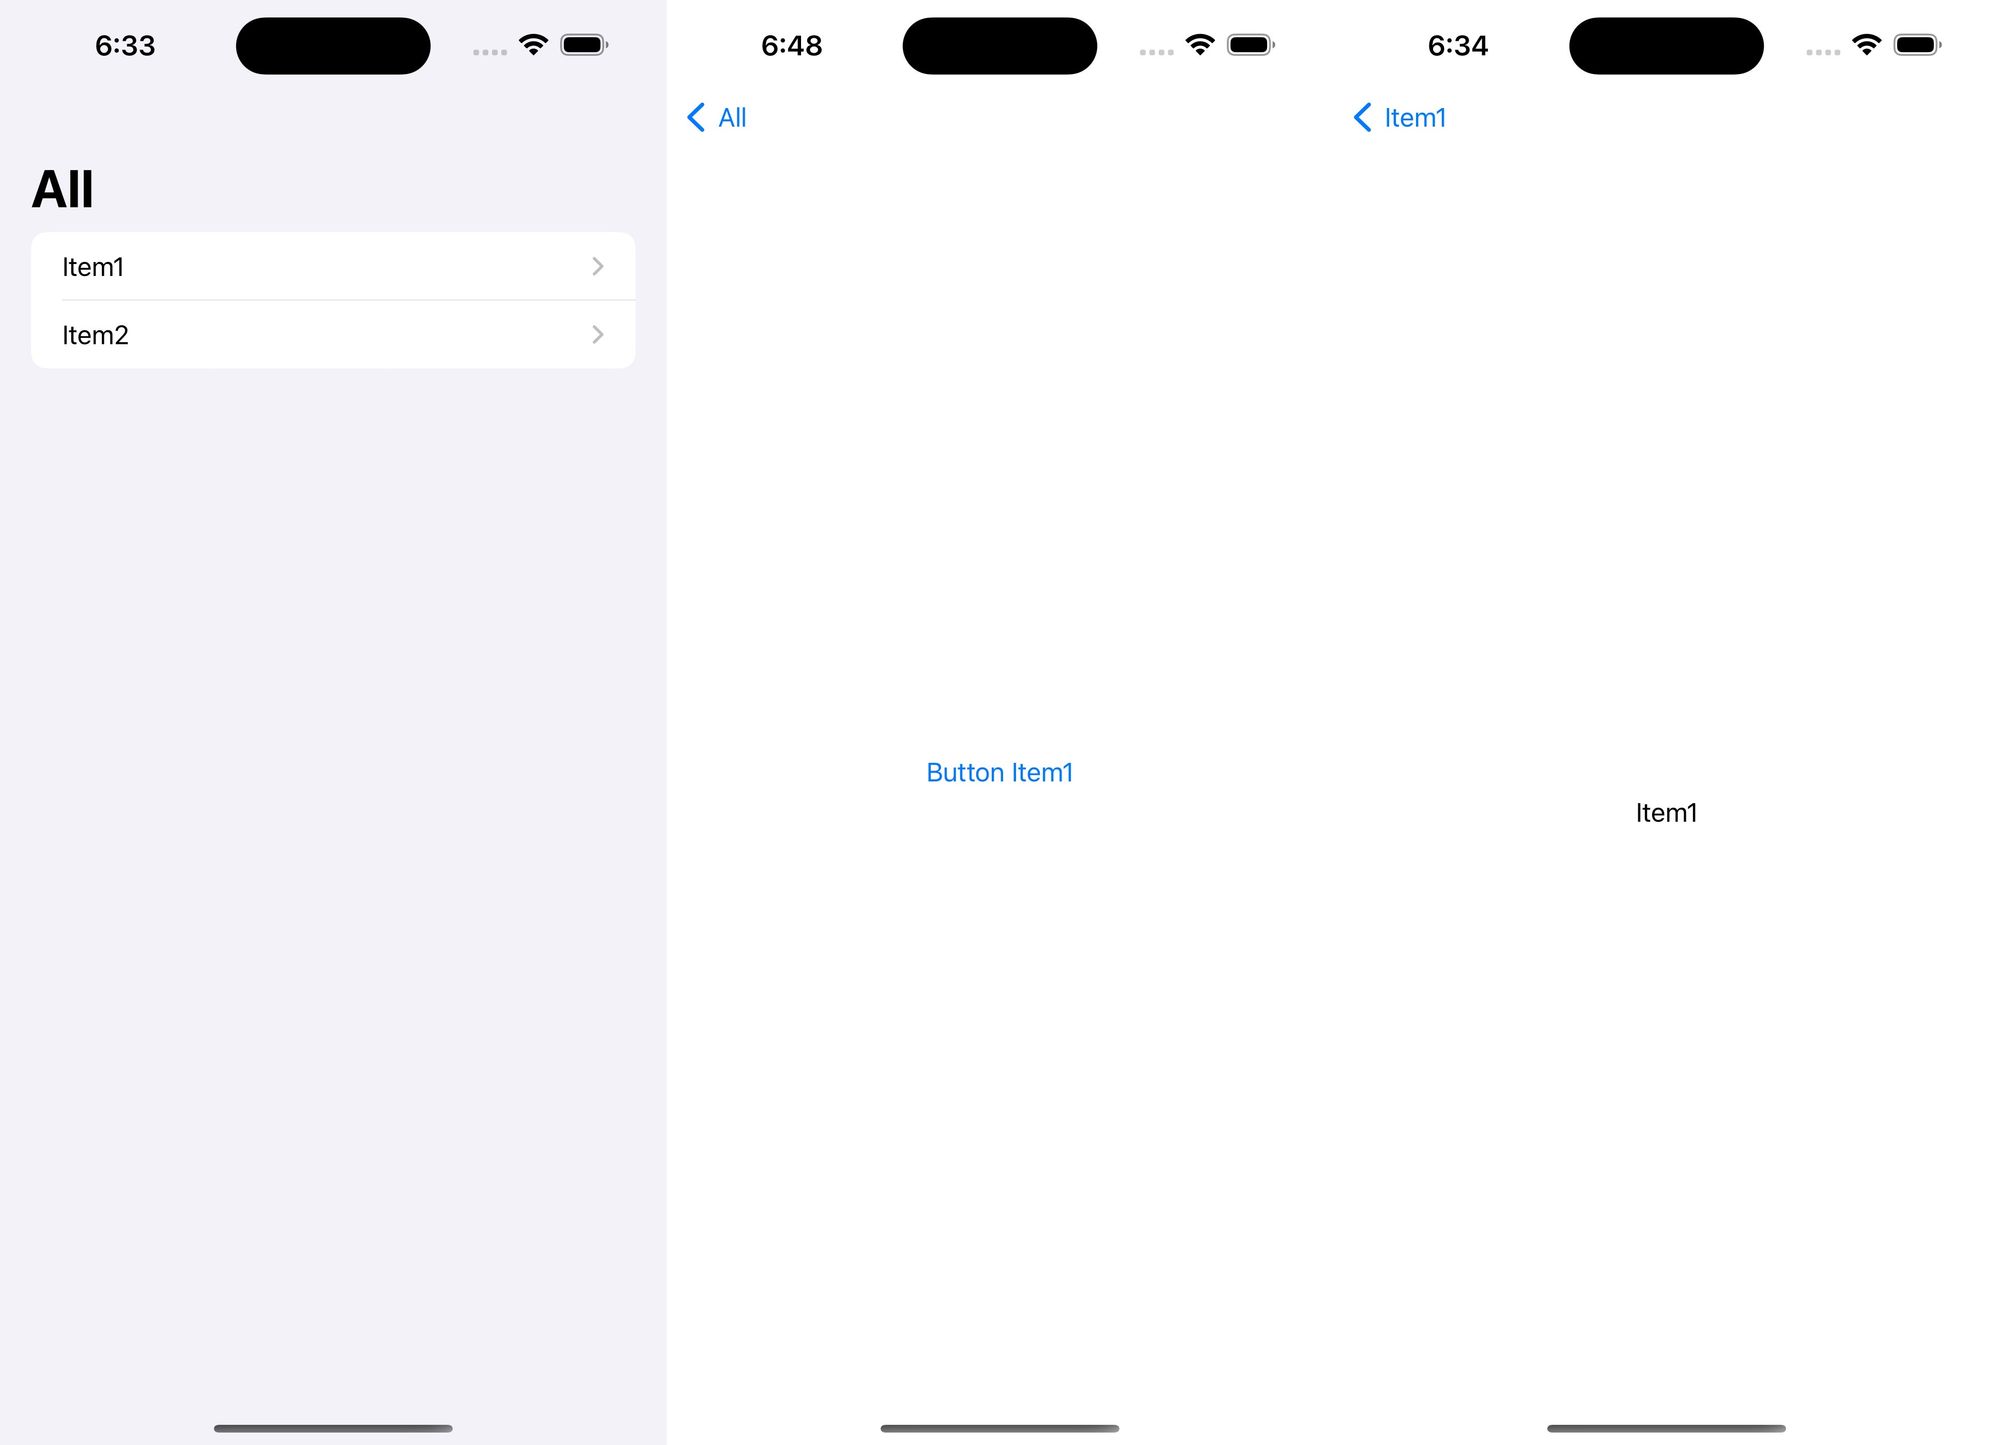
A 2-level deep detail view on a NavigationSplitView running on an iPhone/compact horizontal size class.
Now let's get rid of that bog-standard List view in the sidebar and replace it with a horizontal grid:
struct ContentView: View {
    @State private var selectedItem: String?
    @State private var navPath = NavigationPath()

    @State private var folders = [
        "All": [
            "Item1",
            "Item2"
        ],
        "Favorites": [
            "Item2"
        ]
    ]

    let rows = [GridItem(.fixed(30))]

    var body: some View {
        NavigationSplitView {
            ScrollView {
                LazyHGrid(rows: rows) {
                    ForEach(folders["All", default: []], id: \.self) { item in
                        NavigationLink(value: item) {
                            Text(verbatim: item)
                        }
                    }
                }
            }
            .navigationTitle("All")
        } detail: {
            NavigationStack(path: $navPath) {
                VStack {
                    if let selectedItem {
                        Button("Button \(selectedItem)") {
                            navPath.append(selectedItem)
                        }
                    } else {
                        Text("Choose an item from the content")
                    }
                }
                .navigationDestination(for: String.self) { text in
                    Text(verbatim: text)
                        .navigationTitle(text)
                }
            }
        }
    }
}
It looks great (🙃). Let's test and then ship it!
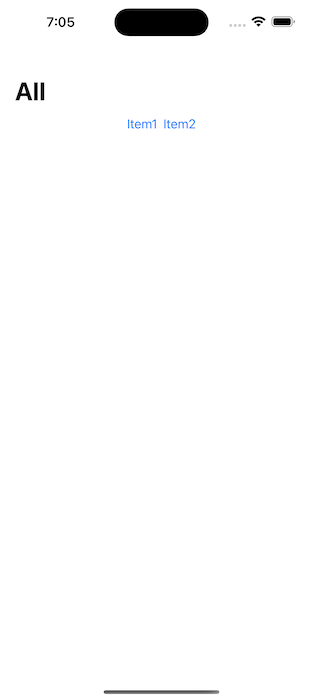
A svelte grid layout in the side bar instead of a List . 🔥!
As soon as we select an item though, we get a runtime error:
A NavigationLink is presenting a value of type “String” but there is no matching navigationDestination declaration visible from the location of the link. The link cannot be activated.
Ugh. Let's fix that by providing the sidebar view with a .navigationDestination. We will move the detail view to it's own struct so it can be re-used.
struct ContentView: View {
    @State private var selectedItem: String?
    @State private var navPath = NavigationPath()

    @State private var folders = [
        "All": [
            "Item1",
            "Item2"
        ],
        "Favorites": [
            "Item2"
        ]
    ]

    let rows = [GridItem(.fixed(30))]

    var body: some View {
        NavigationSplitView {
            ScrollView {
                LazyHGrid(rows: rows) {
                    ForEach(folders["All", default: []], id: \.self) { item in
                        NavigationLink(value: item) {
                            Text(verbatim: item)
                        }
                    }
                }
            }
            .navigationDestination(for: String.self) { selection in
                DetailView(navPath: $navPath, selectedItem: selection)
            }
            .navigationTitle("All")
        } detail: {
            NavigationStack(path: $navPath) {
                DetailView(navPath: $navPath, selectedItem: selectedItem)
            }
        }
    }
}

struct DetailView: View {
    @Binding var navPath: NavigationPath
    let selectedItem: String?
    var body: some View {
        VStack {
            if let selectedItem {
                Button("Button \(selectedItem)") {
                    navPath.append(selectedItem)
                }
            } else {
                Text("Choose an item from the content")
            }
        }
        .navigationDestination(for: String.self) { text in
            Text(verbatim: text)
                .navigationTitle(text)
        }
    }
}
When we run this we get to the first level of the detail view, but when we select the “Button ItemN” programmatic navigation button... nothing happens. And this is where it all falls apart.
As of this writing, Jan 1, 2023, on Xcode 14.2 there is no way (that I've found) to programmatically navigate to the second level of the detail view. SwiftUI just doesn't do anything. There are no errors or warnings in the debug console. There is just silence and no navigation.
In fact, the only way to get the detail view to push a second level deep without a List-backed sidebar is to get rid of programmatic navigation on the detail view altogether and replace the button with a NavigationLink:
struct DetailView: View {
    @Binding var navPath: NavigationPath
    let selectedItem: String?
    var body: some View {
        VStack {
            if let selectedItem {
                NavigationLink(value: selectedItem) {
                    Text("NavigationLink \(selectedItem)")
                }
            } else {
                Text("Choose an item from the content")
            }
        }
        .navigationDestination(for: String.self) { text in
            Text(verbatim: text)
                .navigationTitle(text)
        }
    }
}

A navigation split view with a grid-based “sidebar” view and a NavigationLink in the first detail view.
Great! It works now—but only if your user selects the navigation link directly. As with many things in SwiftUI over the last 4 years, this feels like such simple edge case, and yet there's nothing that can be done about it. Our options are either:
- Host a
UISplitViewControllerin our SwiftUI app and manually handle navigation. - Don't programmatically navigate after the first detail view.
- Use a
Listfor the sidebar view and deal with the visual constraints of aList.
Hopefully this is something the SwiftUI team at Apple can resolve soon. iOS 16 brought a huge quality-of-life improvement to navigation on SwiftUI. It would be nice to see this fixed before iOS 17, but until then if you require a unique-looking UI that navigates sanely, don't let your UIKit skills atrophy just yet. SwiftUI continues to be “close” but not quite “there” yet for another year.