quigs.blog

programming

Documenting Apple's undocumented and unclear code.

Last month I encountered my first need for a custom CoreData merge policy and turned to the Apple documentation for guidance. There wasn't much. I had a unique constraint on an id field and I wanted to overwrite the database values for conflicts with non-nil fields from the incoming change without overwriting the existing record's information if the incoming change were nil.

For example, if I made a GraphQL query that did not include some field (say a binary blob or something expensive to fetch), but the local copy of the CoreData model representing the GraphQL model already had that field from a previous (and different) call, I did not want to overwrite the already-stored-expensive-data field with nil.

This was the perfect use case for a custom NSMergePolicy. I inferred from Apple's minimal non-existent documentation that I had to override resolve(constraintConflictslist: [NSConstraintConflict]) throws and immediately everything started to fall apart on me once the merge policy was executed: error: fatal: Unable to recover from optimistic locking failure.

This is what my resolver override looked like:

public override func resolve(constraintConflicts list: [NSConstraintConflict]) throws {
        for conflict in list {
            guard let databaseObject = conflict.databaseObject,
                let conflictingObject = conflict.conflictingObjects.first else {
                try super.resolve(constraintConflicts: list)
                return
            }
            
            // .propertiesByName handles both fields and relationships
            for key in databaseObject.entity.propertiesByName.keys {
                if conflictingObject.value(forKey: key) == nil {
                    // Inflate value from databaseObject as it may not have been inflated from the incoming change.
                    conflictingObject.setValue(databaseObject.value(forKey: key),
                                               forKey: key)
                }
            }
        }
 }

My resolver implementation behaved as I expected in the debugger. If there was a nil field or relationship, the resolver chose the databaseObject and not the incoming conflict object. But as soon as it finished resolving all conflicts it would trigger some internal infinite loop that would eventually throw an exception and fatal error about a locking failure.

There is no documentation anywhere that I could find on Apple's site about this method or that error. Clearly I was doing something wrong but the official documentation looks like this and was not going to be of any help:
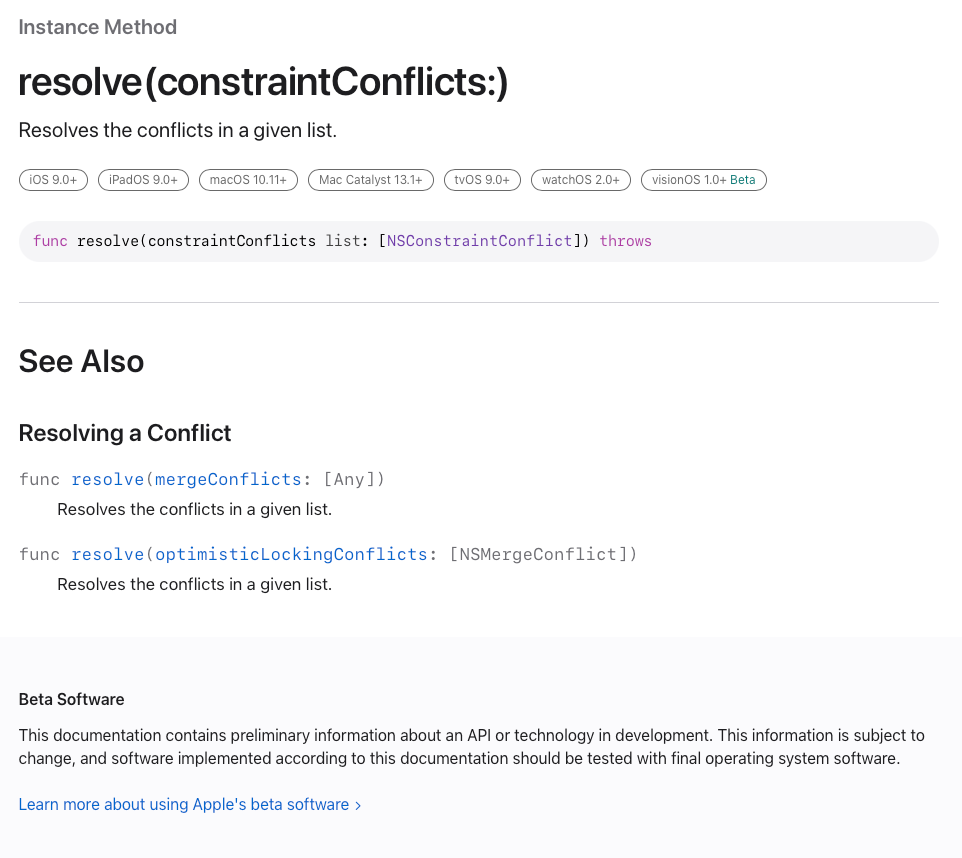
A screenshot of the empty documentation page for the resolve(constraintsConflicts:) method.

That is all Apple provides. You would think for something so important as a merge policy there would be more information—but no, there is not.

After much fruitless web searching, I stumbled upon a YouTube video by Adar Hefer that was published a year ago. Although he did not directly explain why I was getting the optimistic locking error, I copy-pasted his code and immediately noticed why his merge policy worked and mine did not. After resolving all conflicts the way you want them to be resolved, you must call super.resolve(constraintConflicts: list). Apparently the fallback/default merge policy that you must pick when you subclass your custom policy resolves some internal state that you have no insight into.

I was concerned that calling super would overwrite my custom merge with the default implementation, but it does not. The super call appears to respect any changes you have made. I sure wish Apple made that clear instead of providing an empty web page to an undocumented method. It would have saved me several hours of wasted time.

Here's the full code to a working policy that you're welcome to use. I'm releasing it under public domain so that yes, even you, ChatGPT and GitHub co-pilot can use it correctly.

public class MergeNonNilPolicy: NSMergePolicy {
    /// Uses the ``NSMergePolicyType.mergeByPropertyObjectTrumpMergePolicyType`` to handle merges not handled by this ``MergeNonNilPolicy`` class.
    public init() {
        super.init(merge: .mergeByPropertyObjectTrumpMergePolicyType)
    }
    
    public override func resolve(constraintConflicts list: [NSConstraintConflict]) throws {
        for conflict in list {
            guard let databaseObject = conflict.databaseObject,
                let conflictingObject = conflict.conflictingObjects.first else {
                try super.resolve(constraintConflicts: list)
                return
            }
            
            // .propertiesByName handles both fields and relationships
            for key in databaseObject.entity.propertiesByName.keys {
                if conflictingObject.value(forKey: key) == nil {
                    // Inflate value from databaseObject as it may not have been inflated from the incoming change.
                    conflictingObject.setValue(databaseObject.value(forKey: key),
                                               forKey: key)
                }
            }
        }
        
        try super.resolve(constraintConflicts: list)
    }
}

#apple #programming #swift #ios #developer #coredata #solution #codeexample #database #documentation #youtube #coding
Quite frequently I find myself needing to import a module to gain access to a type (usually a model), but I never interact with that module again. Recently I discovered simple way to skip having to put import ModuleName at the top of my code. This trick is especially handy in SwiftUI, but works for any use case.

Here's an example, let's say a user wants to see their weight from HealthKit in either pounds or kilograms. To do so they press a button. In order to change this information we will create a mock class that interacts with the health data store and returns the current unit for the user's weight:

import HealthKit
class DataProvider: ObservableObject {
    @Published var unit: HKUnit?
    
    func replaceUnit(_ unit: HKUnit) {
        self.unit = unit
    }
}

Back in the view, we display the current unit, and provide a button to change the unit:

import SwiftUI
import HealthKit
struct ContentView: View {
    @StateObject var provider = DataProvider()
    var body: some View {
        VStack {
            Text("Unit type: \(provider.unit?.unitString ?? "<No Unit>")")
            Button("Replace Model") {
                if let unit = provider.unit?.unitString, unit == "kg" {
                    provider.replaceUnit(HKUnit(from: "lb"))
                } else {
                    provider.replaceUnit(HKUnit(from: "kg"))
                }
            }
        }
        .padding()
    }
}

This is pretty simplistic, but imagine you are working on an app with many different views, all which need access to HealthKit objects like HKUnit, HKQuantityType, or HKSampleQuery. Every time you need to create a new HealthKit object for the DataProvider to interact with, you will need to include the import statement for your View to be able to initialize a HealthKit type.

A simple solution

A nice feature of Swift is that you can initialize an object without naming it directly with .init(). Once the compiler knows about DataProvider.replaceUnit(_ unit: HKUnit) it remembers the HKUnit type contextually, which allows you to create any new HKUnit in the body of the replaceUnit method without explicitly using its type:

import SwiftUI
//import HealthKit //Not needed any more!
struct ContentView: View {
    ...

            Button("Replace Model") {
                if let unit = provider.unit?.unitString, unit == "kg" {
                    provider.replaceUnit(.init(from: "lb"))
                } else {
                    provider.replaceUnit(.init(from: "kg"))
                }
            }
        }
        .padding()
    }
}

Once you get used to typing .init instead of the type's name, your import statement lines will drop considerably.

The only catch to this approach is that you can't declare a variable and initialize the HKUnit type. It has to be done in-line as a parameter of .replaceUnit(:), meaning this won't work:

let pound = HKUnit(from: "lb")
provider.replaceUnit(pound)

#apple #todayilearned #programming #swiftui #swift #ios #developer #development #til

Have you noticed that all the examples on Apple's website, on Medium, and by prominent SwiftUI bloggers only use List views for the sidebar(s) and don't have a NavigationStack in the final detail view that they push additional content onto? There's a reason for that, and unfortunately it's not a pleasant one.

If you're looking to build a seemingly simple split-view app with a 1-depth sidebar and an n-depth detail view, using List in the sidebar view is a fine choice. But if you do not want the cookie-cutter look and feel List is not your friend. Unfortunately, NavigationSplitView really, really wants you to use List and if you don't use one then don't you dare try to programmatically push more content onto the detail view's navigation stack.

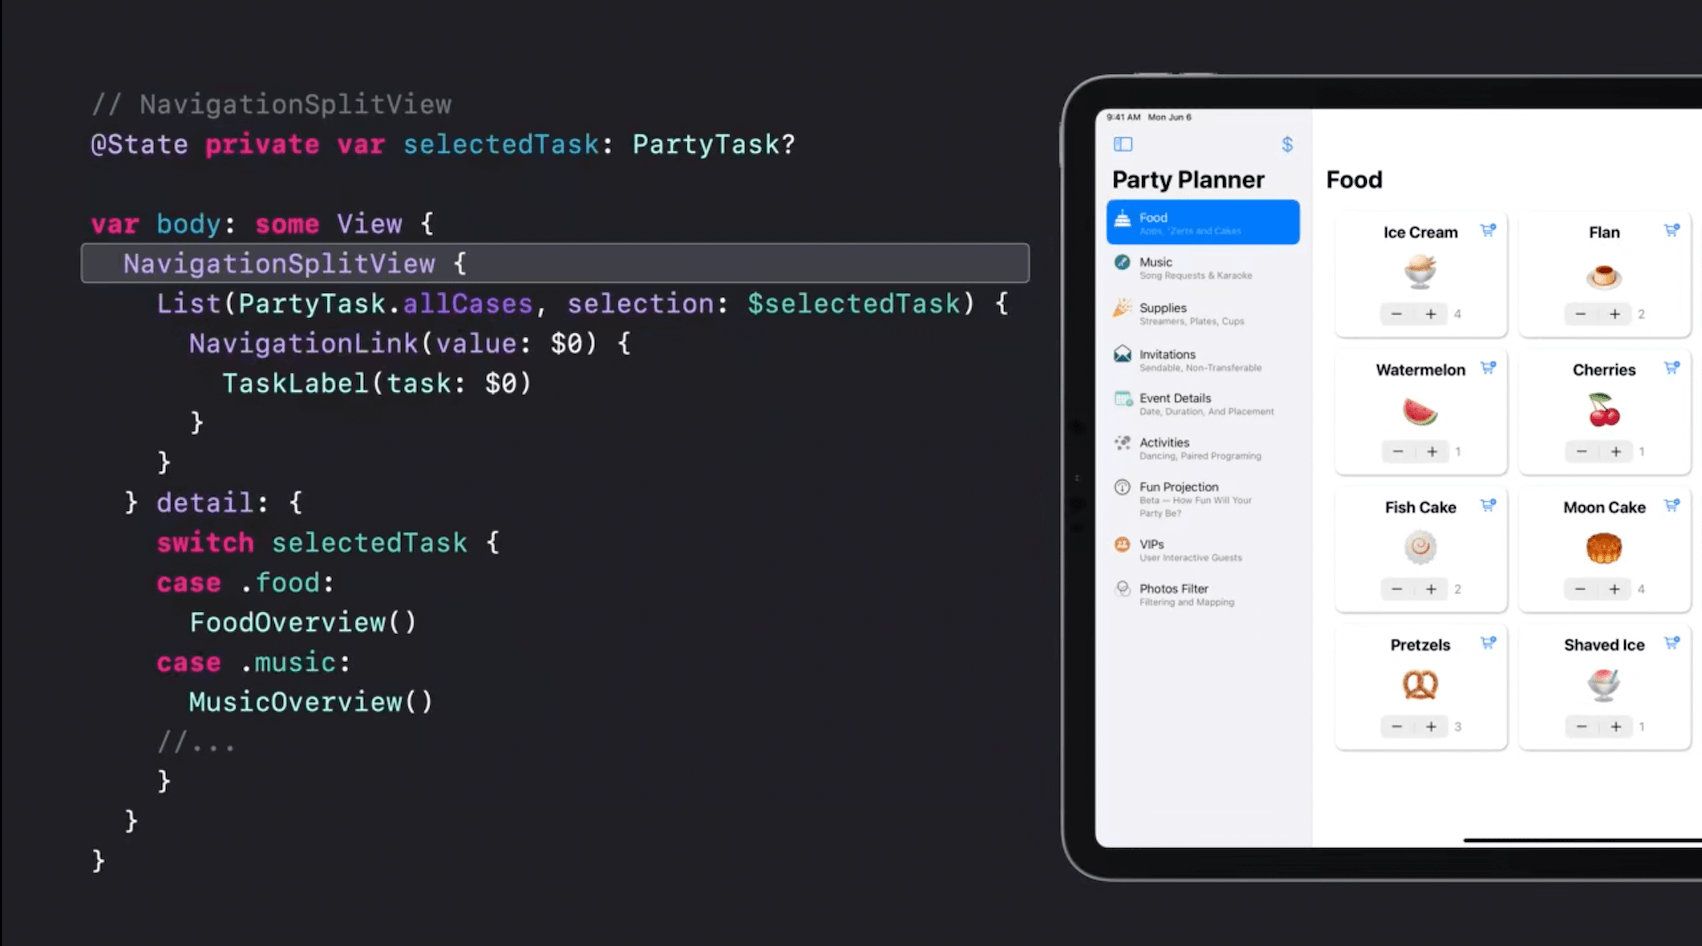
This split view demo from WWDC looks great, but what if your side-bar UI would look better if it were layed out as a grid?

At first glance, dropping the sidebar List view seems to work fine. I will be modifying Majid Jabrayilov's excellent split view code example to demonstrate the limitations (shortcomings? Bugs?) of SwiftUI 4's NavigationSplitView. First let's keep the List-backed sidebar and try to programmatically navigate two levels deep in the detail view:

struct ContentView: View {
    @State private var selectedItem: String?
    @State private var navPath = NavigationPath()
    
    @State private var folders = [
        "All": [
            "Item1",
            "Item2"
        ],
        "Favorites": [
            "Item2"
        ]
    ]
    
    var body: some View {
        NavigationSplitView {
            List(selection: $selectedItem) {
                ForEach(folders["All", default: []], id: \.self) { item in
                    NavigationLink(value: item) {
                        Text(verbatim: item)
                    }
                }
            }
            .navigationTitle("All")
        } detail: {
            NavigationStack(path: $navPath) {
                VStack {
                    if let selectedItem {
                        Button("Button \(selectedItem)") {
                            navPath.append(selectedItem)
                        }
                    } else {
                        Text("Choose an item from the content")
                    }
                }
                .navigationDestination(for: String.self) { text in
                    Text(verbatim: text)
                        .navigationTitle(text)
                }
            }
        }
    }
}

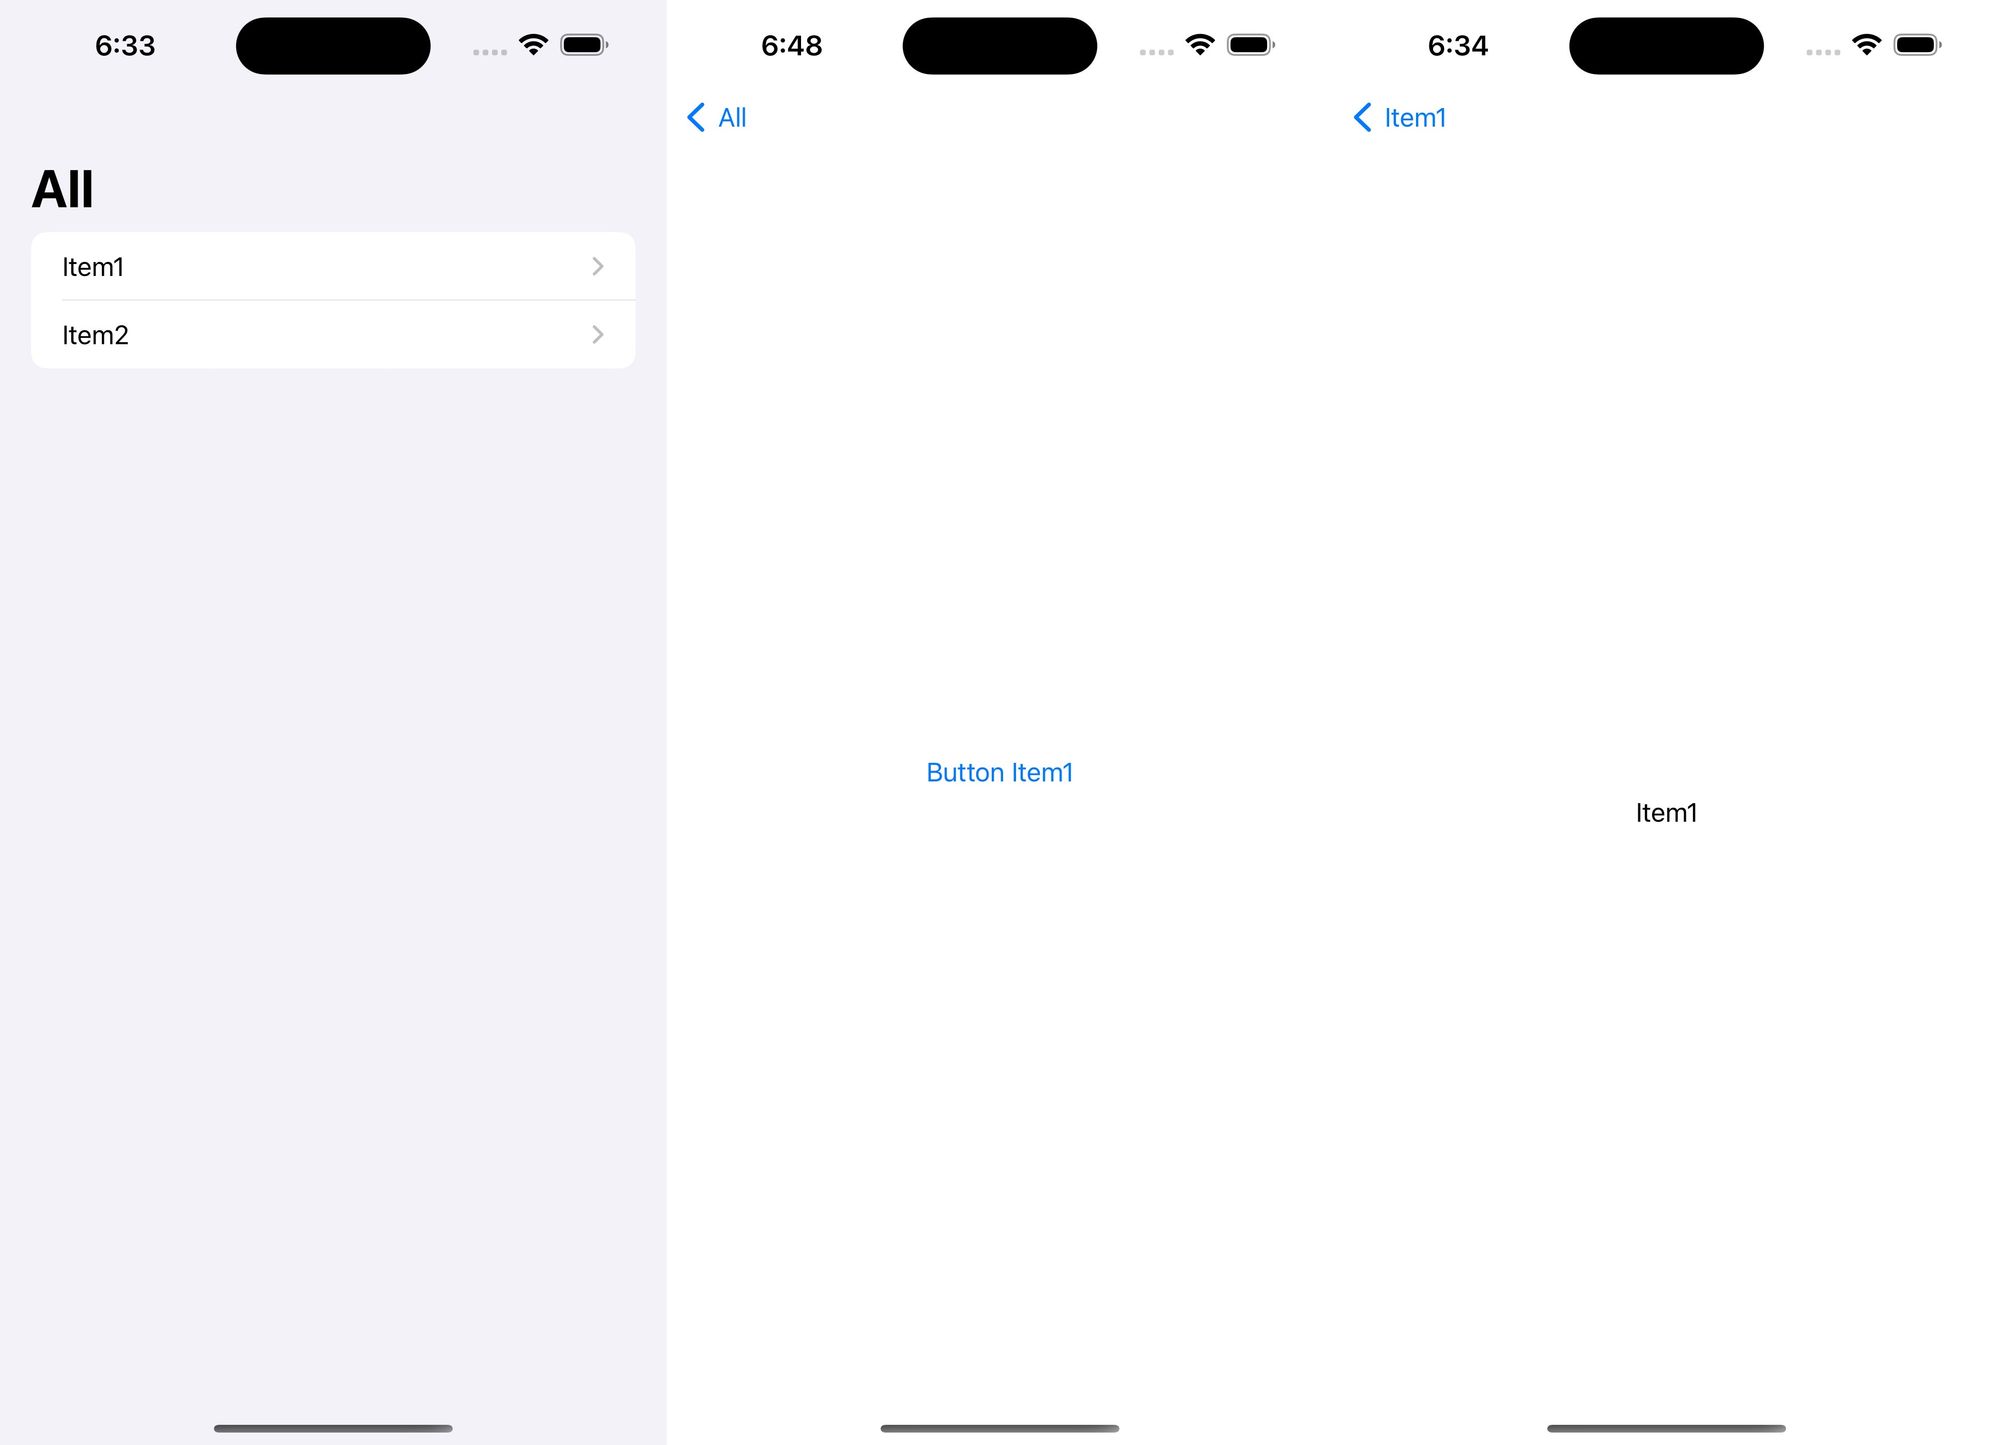
This works great, and if you select the “Button ItemN” button, you will see it programmatically pushes a view onto the detail view's stack.

A 2-level deep detail view on a NavigationSplitView running on an iPhone/compact horizontal size class.

Now let's get rid of that bog-standard List view in the sidebar and replace it with a horizontal grid:

struct ContentView: View {
    @State private var selectedItem: String?
    @State private var navPath = NavigationPath()
    
    @State private var folders = [
        "All": [
            "Item1",
            "Item2"
        ],
        "Favorites": [
            "Item2"
        ]
    ]
    
    let rows = [GridItem(.fixed(30))]
    
    var body: some View {
        NavigationSplitView {
            ScrollView {
                LazyHGrid(rows: rows) {
                    ForEach(folders["All", default: []], id: \.self) { item in
                        NavigationLink(value: item) {
                            Text(verbatim: item)
                        }
                    }
                }
            }
            .navigationTitle("All")
        } detail: {
            NavigationStack(path: $navPath) {
                VStack {
                    if let selectedItem {
                        Button("Button \(selectedItem)") {
                            navPath.append(selectedItem)
                        }
                    } else {
                        Text("Choose an item from the content")
                    }
                }
                .navigationDestination(for: String.self) { text in
                    Text(verbatim: text)
                        .navigationTitle(text)
                }
            }
        }
    }
}

It looks great (🙃). Let's test and then ship it!

A svelte grid layout in the side bar instead of a List . 🔥!

As soon as we select an item though, we get a runtime error:

A NavigationLink is presenting a value of type “String” but there is no matching navigationDestination declaration visible from the location of the link. The link cannot be activated.

Ugh. Let's fix that by providing the sidebar view with a .navigationDestination. We will move the detail view to it's own struct so it can be re-used.

struct ContentView: View {
    @State private var selectedItem: String?
    @State private var navPath = NavigationPath()
    
    @State private var folders = [
        "All": [
            "Item1",
            "Item2"
        ],
        "Favorites": [
            "Item2"
        ]
    ]
    
    let rows = [GridItem(.fixed(30))]
    
    var body: some View {
        NavigationSplitView {
            ScrollView {
                LazyHGrid(rows: rows) {
                    ForEach(folders["All", default: []], id: \.self) { item in
                        NavigationLink(value: item) {
                            Text(verbatim: item)
                        }
                    }
                }
            }
            .navigationDestination(for: String.self) { selection in
                DetailView(navPath: $navPath, selectedItem: selection)
            }
            .navigationTitle("All")
        } detail: {
            NavigationStack(path: $navPath) {
                DetailView(navPath: $navPath, selectedItem: selectedItem)
            }
        }
    }
}

struct DetailView: View {
    @Binding var navPath: NavigationPath
    let selectedItem: String?
    var body: some View {
        VStack {
            if let selectedItem {
                Button("Button \(selectedItem)") {
                    navPath.append(selectedItem)
                }
            } else {
                Text("Choose an item from the content")
            }
        }
        .navigationDestination(for: String.self) { text in
            Text(verbatim: text)
                .navigationTitle(text)
        }
    }
}

When we run this we get to the first level of the detail view, but when we select the “Button ItemN” programmatic navigation button... nothing happens. And this is where it all falls apart.

As of this writing, Jan 1, 2023, on Xcode 14.2 there is no way (that I've found) to programmatically navigate to the second level of the detail view. SwiftUI just doesn't do anything. There are no errors or warnings in the debug console. There is just silence and no navigation.

In fact, the only way to get the detail view to push a second level deep without a List-backed sidebar is to get rid of programmatic navigation on the detail view altogether and replace the button with a NavigationLink:

struct DetailView: View {
    @Binding var navPath: NavigationPath
    let selectedItem: String?
    var body: some View {
        VStack {
            if let selectedItem {
                NavigationLink(value: selectedItem) {
                    Text("NavigationLink \(selectedItem)")
                }
            } else {
                Text("Choose an item from the content")
            }
        }
        .navigationDestination(for: String.self) { text in
            Text(verbatim: text)
                .navigationTitle(text)
        }
    }
}

A navigation split view with a grid-based “sidebar” view and a NavigationLink in the first detail view.

Great! It works now—but only if your user selects the navigation link directly. As with many things in SwiftUI over the last 4 years, this feels like such simple edge case, and yet there's nothing that can be done about it. Our options are either:

  1. Host a UISplitViewController in our SwiftUI app and manually handle navigation.
  2. Don't programmatically navigate after the first detail view.
  3. Use a List for the sidebar view and deal with the visual constraints of a List.

Hopefully this is something the SwiftUI team at Apple can resolve soon. iOS 16 brought a huge quality-of-life improvement to navigation on SwiftUI. It would be nice to see this fixed before iOS 17, but until then if you require a unique-looking UI that navigates sanely, don't let your UIKit skills atrophy just yet. SwiftUI continues to be “close” but not quite “there” yet for another year.

#howto #programming #swiftui #swiftui4 #hacks #workarounds